
A Perfectionist Print Designer
and the World Wide Web

- “Set up new WordPress blog for your topic of focus/beat. This is SEPARATE from your journal blog. I know, two blogs, crazy! Choose a name for it carefully, and a theme. If you’ve already done this, bully for you. Send me the URL and I’ll create a new blogroll.”
- “Create about page for this topic blog”
- “Set up blogroll on your topic blog with at least five sites related to your topic. Here’s how to do it.”
- “Sign up for at least one email newsletter and/or an RSS feed reader related to your beat (you might want to sign up for some related to our profession more generally, too). There are many possible feed readers out there – do some research to see which one you think best suits you. For example, here are some possibilities, including Feedly.”
- “Set up Google Alerts for your blog topic”
- “If you are already a blogging whiz, or have a topic blog set up already, are there any new features or widgets you could add? If your blog is pre-existing, be sure you do at least one new thing to spruce it up. Describe what you did in your journal blog”
Setting up the Topic Blog – tn liberty
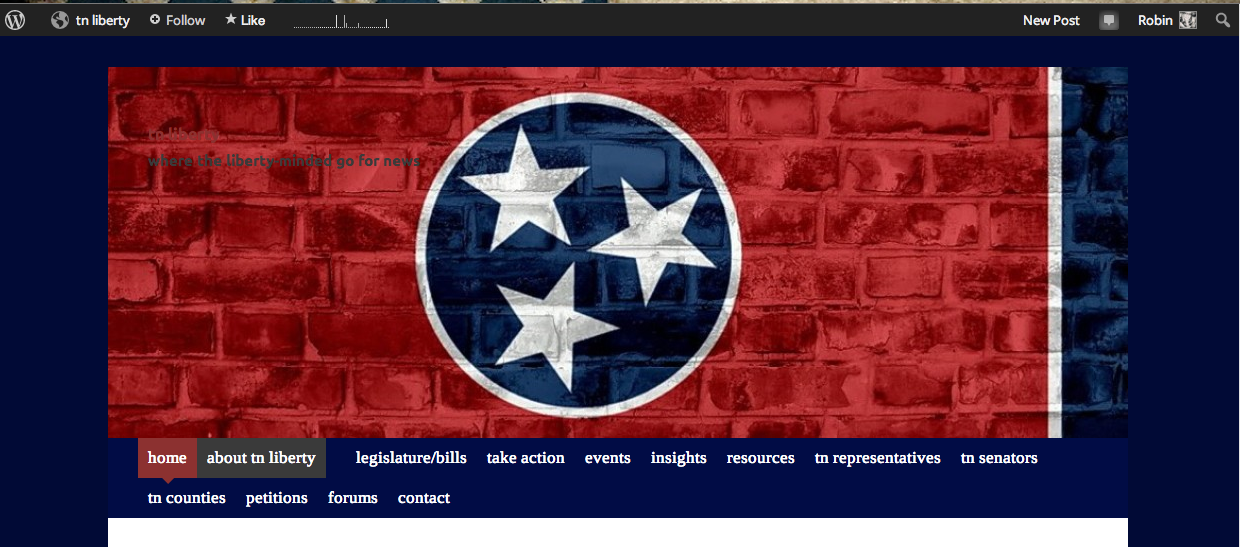 If you’re reading this, you can see that I am quite capable of setting up a blog. WordPress makes it fairly easy. Pick a theme. Check. Name your blog. Check. Add a tagline. Check. Decide if you want your home page to be static or a revolving door that showcases your most recent posts and then, mark it as such. Check Check. Begin adding pages to your new blog. Check Check Check. Add some categories. Check times ten. And here is where the beginner user may have begun to get a little confused. No big deal. WordPress is there to help you with an assortment of support pages, located here. And if you can’t find the answer you need there, check out the forum for support categorized by simple topics, located here. “So what’s the big deal,” you ask? “Obviously, you know enough to make a decently visually appealing and functioning blog.” Yes, I can make it pretty-ish and functional but you forget, I’m a print designer and….drum roll….a perfectionist.
The print designer with a perfectionist personality disorder is used to being in control of how text appears, the spacing in-between each line and each character, the color of the boxes around words and widgets, and so on, and so forth. Sure. I created a blog and matched the color of the fonts to the header that I uploaded – one that I created in Photoshop and InDesign for my Facebook page, Tennessee and Mississippi Leadership. BUT, now there are appearance problems with my site.
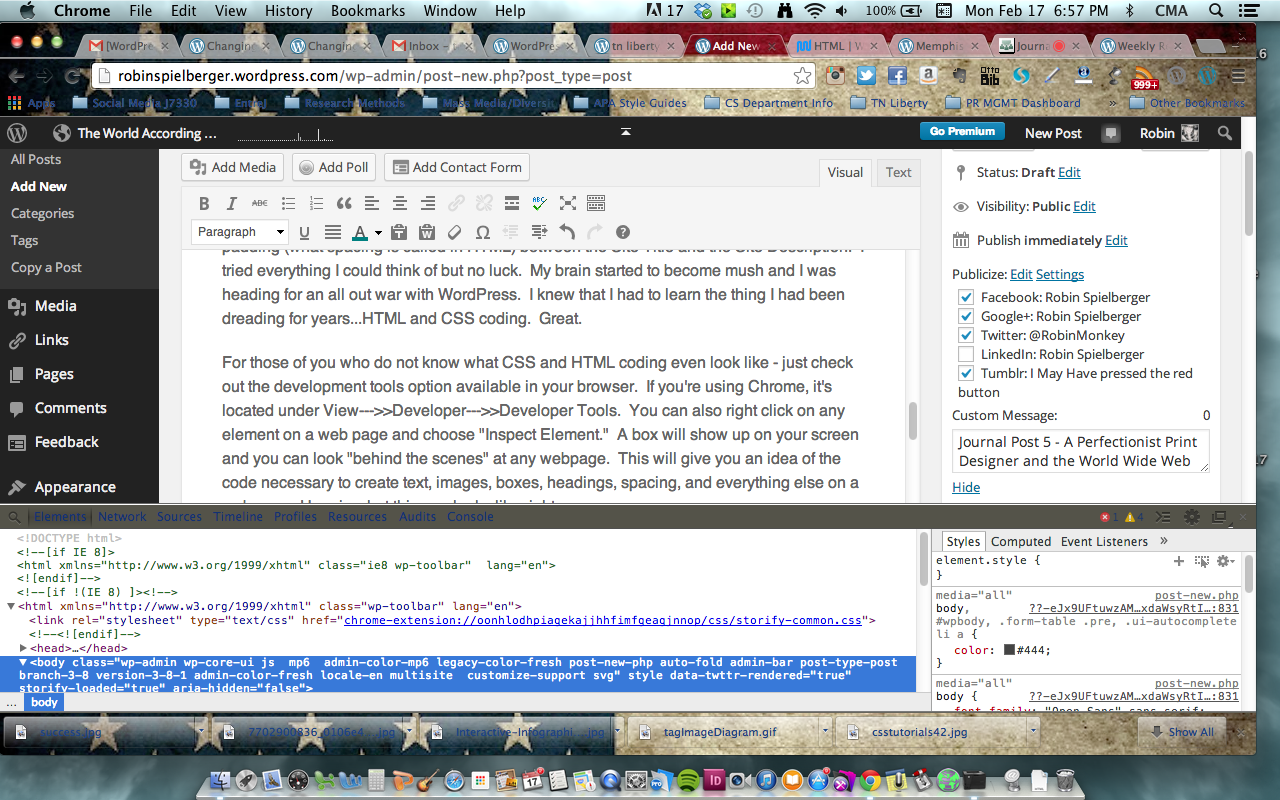
 For some reason, I cannot get the Site Title to change colors in order to become visible against my dark header. I’m not a complete n00b, so I knew a few tricks to try and i refused to be pwned by WordPress. I knew that I wanted the color to be #ffffff (that’s white, for those of you who don’t know). I knew that the text size needed to be at least 50px. I knew that there needed to be extra padding (what spacing is called in HTML) between the Site Title and the Site Description. I tried everything I could think of but no luck. My brain started to become mush and I was heading for an all out war with WordPress. I knew that I had to learn the thing I had been dreading for years…HTML and CSS coding.
Great. Just great.
For those of you who do not know what CSS and HTML coding look like – check out the development tools option available in your browser. If you’re using Chrome, it’s located under View—>>Developer—>>Developer Tools. You can also right click on any element on a web page and choose “Inspect Element.” A box will show up on your screen and you can look “behind the scenes” at any webpage. This will give you an idea of the code necessary to create text, images, boxes, headings, spacing, and everything else on a webpage. Here is what this one looks like right now. Check out the white box highlighted at the bottom of this screen shot. That’s what I was about to “mess with.”
 After realizing that I wasn’t exactly sure what I was doing, I checked out some helpful tips and tricks on several blogs. These sites gave me the basic code that I needed to change simple text. I could now make sentences or words bold by adding <strong>PUT WORDS HERE< /strong>, italicized by adding <em>PUT WORDS HERE< /em>, or even bold and italicized by adding <strong><em>PUT WORDS HERE< /em>< /strong>. I was making headway.
 Next, I investigated the coding needed to change colors, fonts, and sizes in sentences, paragraphs, and words. I figured out that you can use other coding to make colored background boxes, change the text color, and change the appearance of entire groups of text. Not just individual posts or pages but you can change how the “default” text appears for different headings 1, 2, 3, and so on.
I was super excited and throughout the next two days, I filled my mind with every piece of needed code that I could absorb.
tn liberty Blogroll

Now, that I had spent hours learning advanced brain-frying code, it was time to actually complete the assignments that were required of me for this week.
I gathered the URLs for important website and blogs to add to the sidebar of my tn liberty blog in order to guide people to other sources of information about liberty and liberty in TN.
I put the sites into several categories such as Liberty Folk to Follow, Liberty Organizations, Liberty in Tennessee, Liberty Resources, and TN Student Liberty. Under each category, I added links to some of the most popular sites.
 Mention & Google Alerts
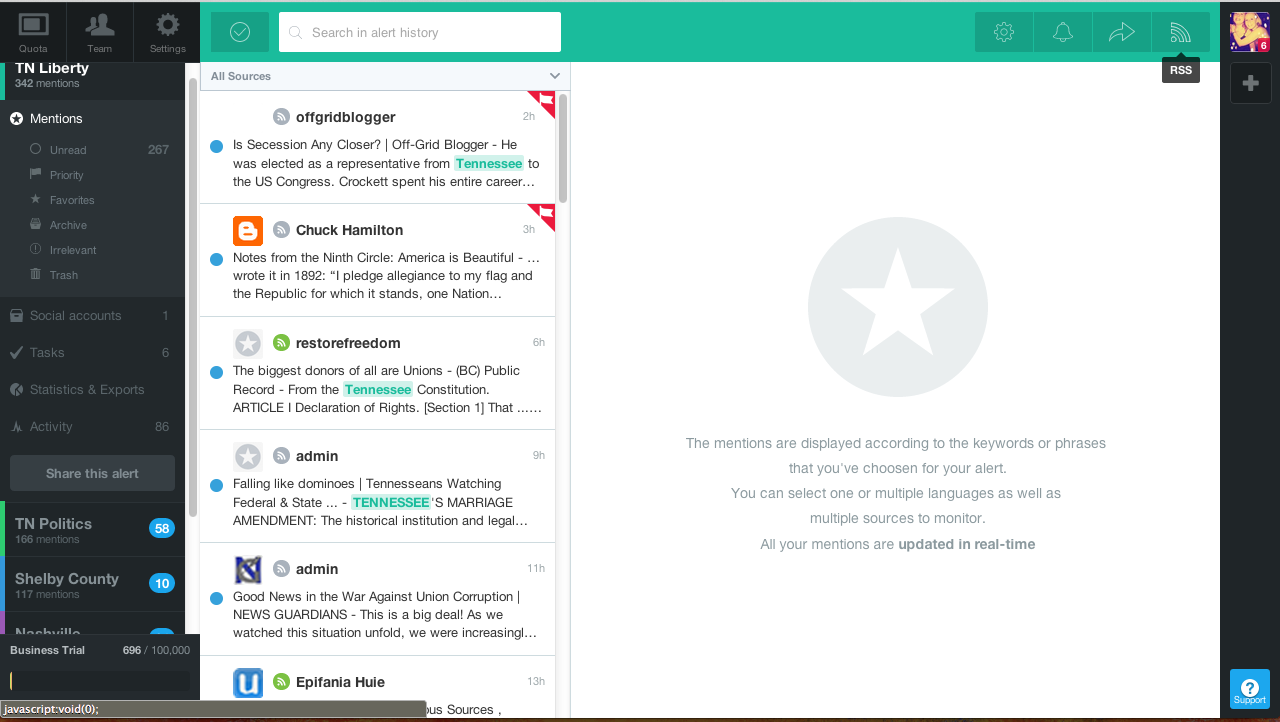
Next, I decided to go ahead and set up an alert system for my blog topic of liberty in Tennessee. I have used several different “alert” systems in the past and decided to set up Mention, first.
I created several alerts such as “Tennessee” AND “Liberty,” “Tennessee” and “Politics,” “Memphis” AND “Council” OR “Commission” OR “laws” OR “government,” and “Knoxville” AND “politics“. I added an alert for each major area of Tennessee and used several different search options in order to get a more comprehensive collection of news stories.
 I did the same thing for Google Alerts. It is a much less visually appealing system, as you can see on the left. It also doesn’t provide you the option to sort and set tasks for your “alerts.” For example, Mention allows several users to work with the same “alerts” and share them with each other – assigning tasks such as “post this to the blog” or “verify this information.” Google Alerts are sent to your email address either daily or once a week, depending on your settings.
I also set up Google Alerts and Mention to inform me if anyone in the interwebs happens to mention either one of my blogs specifically. As I learned in PR Management last semester – there are numerous tools available in order to know what your audience is saying about you and how they are responding to you. You have to stay engaged – so I want to know if people are talking about me. True – it probably has less to do with monitoring my “brand” and more to do with the human nature psychosis of “OMG SOMEONE IS TALKING ABOUT ME?!?!? WHAT ARE THEY SAYING?!?!”
Feedly & the RSS Reader
So, there is this thing called a RSS feed. It sounds more complicated than it actually is. Subscribing to a website RSS removes the need for you to manually check the website for new content. Instead, their browser constantly monitors the site and informs you of any updates. You can also command the browser to automatically download the new data.
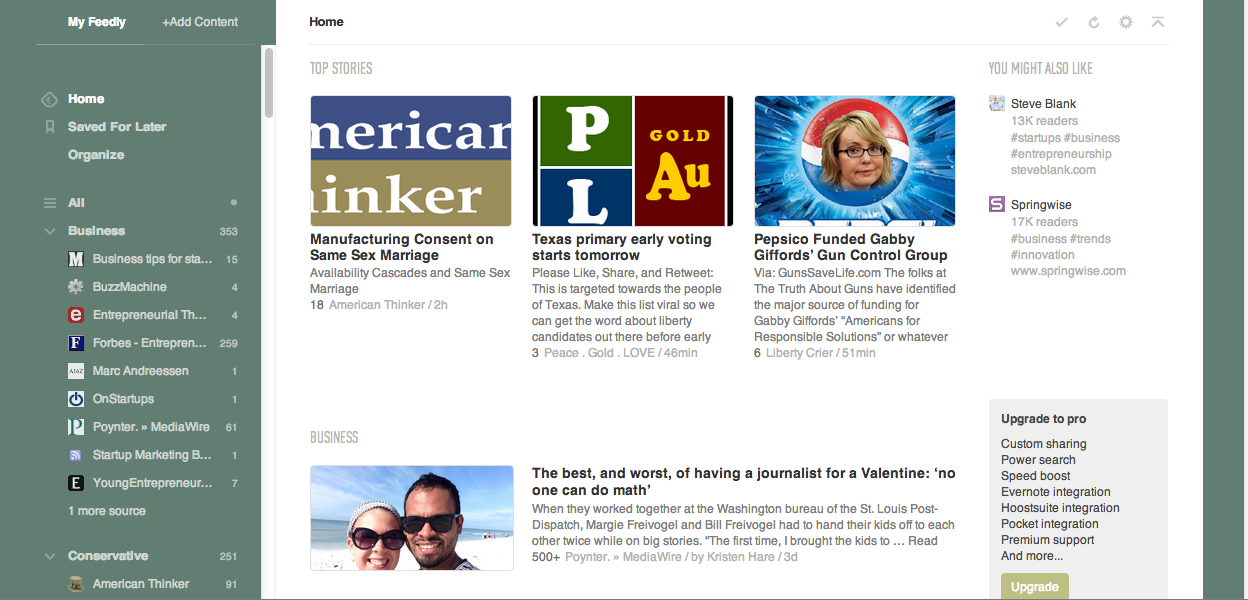 I first set up the Google Chrome Browser desktop app for Feedly from the Chrome Web Store. It works quite well, plus it has a visually appealing interface. If you can’t tell by now, I like ALL the things to look pretty, as well as neat and clean. I used Feedly’s search box to enter terms that were relevant to Tennessee and liberty and politics. Plus, I also added a few blogs and sites manually. For the most part – Feedly was helpful for major news sites and major blogs. I also added more journalism influencers, startup kings, and media sites to Feedly, because it seems to be the best bet for actually aggregating my everyday news.
I then found another extension located in the Chrome Browser Web Store. Yep, that sure sounds a lot like an Apple product but hey, whatever works. I downloaded the extension for a  simple RSS Feed Reader and it loaded itself into my browser bar for easy access. I really like it a lot for its simple integration directly into my browser space. I don’t need a desktop app and it doesn’t take up a lot of space or waste space on pretty pictures. I like pretty pictures and when i’m interested in reading a collection of news stories, I’ll probably use Feedly, because it displays a photo and headline in an aggregated news format like most apps would. This RSS Feed Reader reminds me of something very old school that would run on the very basic operating systems.
However, it gets a 5 star rating and the other readers barely get 3 stars. It’s simple and to the point. I add websites and blogs, put them into folders based on my category creation, and when they get new information, a number appears next to it signifying how many new stories are ready for me to read. I can easily click the X, if it is not pertinent or click the Check mark once i’ve read it or just to mark it as read and move on. I’d check it out if you are looking for ways to add content to your Topic blog quickly and simply.
 Using Code to Spruce it Up

Using a text widget, I first wanted to add a donation button to my page. After reading an article about how to do so, I decided to give it a whirl. Then, I had a thought. I wonder if I would be able to add a colored box around it so that it stood out and matched by overall design? I opened the text widget box and began messing with the code. After moving it piece by piece and saving each time so I didn’t lose anything, I was able to get it close to what I wanted. I’m sure this won’t be my final result. Why? Because as I said earlier, I’m a perfectionist.

UPDATE: And I was right. After writing this draft, going to eat dinner, and watching The Following, I came back and messed with the code until I was happy. Check it out on my site!!
Next, I wanted to use the text widget and code to create a Title and Tagline that would be located on top of the above donation widget. I realized that the donation widget used a <div/> code (a type of coding for paragraphs and divisions, if you will) and inside that code the button itself was actually a link URL image code that starts with <irc. I figured why not use the same type of coding to create the Title and Tagline “widget” that I wanted.
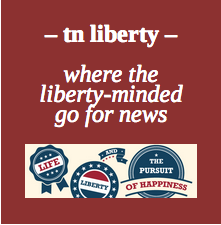 After creating, editing, and saving for approximately 30 minutes, I created something close to perfect. I’m very happy with it actually but will probably edit it again to make the tagline a little smaller. However, it is growing on me, as is.
Overall, my site is coming along nicely. I am still trying to figure out how to edit the CSS on the theme stylesheet in order to make my actual site title the correct color and increase the font size but I have some posts on the CSS Customization Forum and am sure that someone will help me out any day now.
Until then – i’m good.
UPDATE: An extremely nice guy responded to me on the WordPress CSS Customization forum with some tips on how to go about changing my title and site description to better fit my wants and needs. He supplied me with a bit of basic CSS code and pointed me in the right direction. I messed around with it and added some information about margin spacing – had NO idea how to go about it or if it was THE way to nudge the text to the left of the page but what was the worst that could happen? It didn’t work?! So, I tried and it worked! I had noticed that in the sample text a line of code about margins ( margin-bottom: 20px; ). I wondered if I were to write code on the next line for margin-left if that would move my text closer to the left side of the page. Low and behold – it worked! I played around with the spacing and the margins and anything else I could think of and came out with an awesome site title for my tn liberty blog.
Although now, I’m wondering how to move the Site Title and the description to the right side of the header…a perfectionist’s work is never done but that’s okay…i’ll figure it out because I know I can!

